Notice
Recent Posts
Recent Comments
Link
| 일 | 월 | 화 | 수 | 목 | 금 | 토 |
|---|---|---|---|---|---|---|
| 1 | 2 | 3 | 4 | 5 | 6 | 7 |
| 8 | 9 | 10 | 11 | 12 | 13 | 14 |
| 15 | 16 | 17 | 18 | 19 | 20 | 21 |
| 22 | 23 | 24 | 25 | 26 | 27 | 28 |
Tags
- 프론트엔드
- cleancode
- node.js
- 자바
- git
- redux
- Servlet
- node
- TypeScript
- 코딩테스트
- 변수
- webpack
- java
- coding
- 자바문제풀이
- react
- @media
- github
- JS
- frontend
- CSS
- media query
- JavaScript
- max-width
- HTML
- 반응형 페이지
- 그럼에도 불구하고
- 코드업
- 그럼에도불구하고
- react-router-dom
Archives
- Today
- Total
그럼에도 불구하고
아날로그 시계 만들기 본문
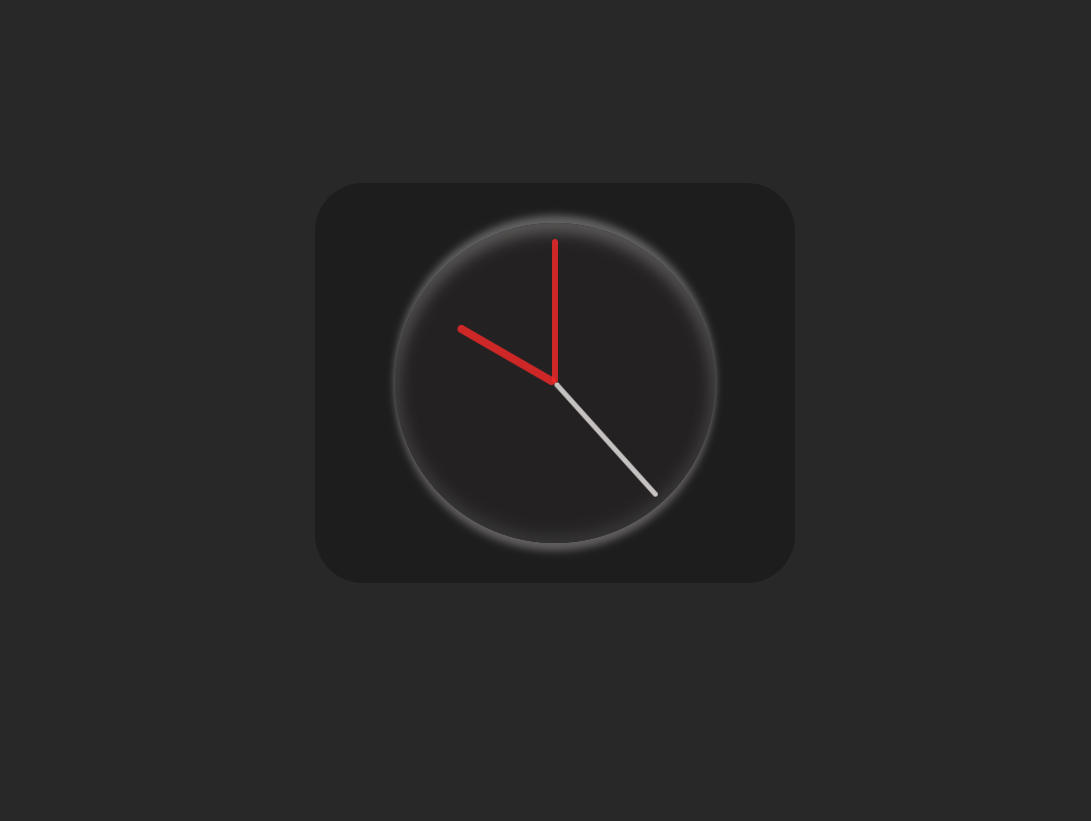
아날로그 시계를 만들어보자

조건:
1. Date 함수를 이용한다.
2. Date 함수를 통해 각도를 구해서 사용한다.
HTML
더보기
<!DOCTYPE html>
<html lang="en">

<head>
  <meta charset="UTF-8">
  <meta http-equiv="X-UA-Compatible" content="IE=edge">
  <meta name="viewport" content="width=device-width, initial-scale=1.0">
  <title>Document</title>
  <link rel="stylesheet" href="./clock.css">
</head>

<body>
  <script src="./clock.js" defer></script>
  <main class="container">
    <div class="clock">
      <div class="hour"></div>
      <div class="minute"></div>
      <div class="second"></div>
    </div>
  </main>
</body>

</html>
CSS
* {
  margin: 0;
  padding: 0;
  box-sizing: border-box;
}

body {
  background-color: rgba(15, 14, 14, 0.889);
}

.container {
  width: 600px;
  height: 500px;
  background-color: rgba(28, 27, 27, 0.829);
  border-radius: 60px;
  margin: 25vh auto;
}

.clock {
  width: 400px;
  height: 400px;
  border-radius: 50%;
  background-color: rgba(37, 36, 36, 0.648);
  position: relative;
  margin: auto;
  top: 50px;
  box-shadow: inset 0px -10px 20px rgb(52, 51, 51),
    0px -10px 10px rgb(99, 98, 98),
    inset 0px 10px 20px rgba(134, 132, 132, 0.648),
    0px 10px 10px rgba(134, 132, 132, 0.648);
}

.hour {
  width: 10px;
  height: 140px;
  background-color: rgba(244, 41, 41, 0.815);
  z-index: 10;
  border-radius: 5px;
  position: absolute;
  top: calc(50% - 140px);
  left: calc(50% - 5px);
  transform-origin: bottom;
}

.minute {
  width: 8px;
  height: 180px;
  background-color: rgba(244, 41, 41, 0.815);
  z-index: 5;
  border-radius: 5px;
  position: absolute;
  top: calc(50% - 180px);
  left: calc(50% - 4px);
  transform-origin: bottom;
}

.second {
  width: 6px;
  height: 190px;
  background-color: rgba(237, 230, 230, 0.815);
  z-index: 1;
  border-radius: 5px;
  position: absolute;
  top: calc(50% - 190px);
  left: calc(50% - 3px);
  transform-origin: bottom;
}
.clock
position: relative;시계 본체로 사용할 clock class는 relative 포지션을 잡아준다.
.hour / .minute / .second
position: absolute;
transform-origin: bottom;
시침, 분침, 초침은 .clock class를 부모로 삼고 자식이 된다. ( top / left 자리를 잡기 위함 )
transform-origin: bottom;
각도 조정을 할 때 bottom을 기준으로 잡는다.
Script
setInterval( () => {

  const date = new Date();

  const h = date.getHours();
  const m = date.getMinutes();
  const s = date.getSeconds();

  const degHour = h * ( 360 / 12 ) + m * ( 360 / 12 / 60 );
  const degMinute = m * ( 360 / 60 );
  const degSecond = s * ( 360 / 60 );

  const  hour = document.querySelector('.hour');
  const  minute = document.querySelector('.minute');
  const  second = document.querySelector('.second');

  hour.style.transform = `rotate(${degHour}deg)`;
  minute.style.transform = `rotate(${degMinute}deg)`;
  second.style.transform = `rotate(${degSecond}deg)`;

},50);
※ degHour의 경우 시간(Hour)에만 영향을 받는 것이 아닌, 분침이 흐를 때도 영향을 받기 때문에 분(Minute)도 같이 더해줘야 한다.
'JavaScript > Function implementation' 카테고리의 다른 글
| Drag & Drop 이용하여 이미지 올리기 (0) | 2023.01.26 |
|---|---|
| "selectstart" 글자 돋보기 만들기 (0) | 2023.01.10 |
| mousemove 이벤트로 색 변환하기 (0) | 2023.01.06 |
| FileReader 객체 사용하여 image 올리기 (0) | 2023.01.05 |
| 배열 무작위 섞기 (셔플) (0) | 2023.01.05 |
Comments


